The fender part of the car is an important component that has high importance at times when we drive in muddy fields; it is good for driving. It is connected close to the tires of the car. In this post we will cover details for car fenders and learn how to replace them if they are not working.
What are car fenders?
- The car tire fender is made with plastic, any metallic material, or rubber that is configured over the wheel on the car side that lies from the front bumper to the car door.
- The basic working of a car fender is to provide protection to tires and the braking system from mud.
- Fenders also provide protection from dust and mud particles flying when the car moves in this area.
- Car fenders are part of the car frame and come in different sizes. It is a curved shape that is located close to the wheel.
Car Fender Working
The main working of a car fender is as
Wheel protection
- A fender is important for a wheel since it protects the wheel from unexpected difficulties on the road. It also helps to protect the moving person and others on the road.
- The dust of the street can cause bad conditions for other people.
- It helps to avoid mud and rocks being thrown into the air. Debris gets stuck when wheels move and provide comfortable driving
Scratch Protection
- This protection is provided with a fender cover, which is a part of the front cloth that exists on both sides of the fender. It protects the car at the time of service of the car.
- During service, it avoided scratches and maintained car components. During services, scratches can occur by mistake; the needed protection is obtained from the fender.
Car Fender Materials

Different materials are used for making car fenders, such as
Rubber
- It is a flexible material for holding debris. Debris entering and leaving the car side can have. Rubber material is connected with a metallic bracket.
Polyurethane
- Polyurethane, also called PU, works as an optimal car protector. This material is created with a combination of rubber and plastic. It is harder as compared to rubber. These features of the material make it resistant to bumps. It also provides resistance for scratches when driving longer.
Steel
- Steel-made fender Protect the car from unexpected debris, such as from mud or rocks, and avoid easy entrance into the fender structure. It also prevents debris from colliding with others for uncomfortable driving.
When to Replace or Repair a Car Fender?
It is based on damage to the fender that defines when we needed to replace or repair the car fender.
Minor Damage:
- Minor damage is the result of small accidents resulting from driving, car parking, rocks striking, etc. This damage can be easily repaired and does not need a complete paint application.
Moderate Damage:
- A dent is moderate damage that occurs due to a collision with a car or any object that exists on the roadside. A fender bender also causes damage and dents on the car that are solved with paint applications and restoring the damage to its real condition.
Serious Damage:
- Any serious damage like a road accident that highly affects the fender and makes it irreparable and also affects the frame structure, bumper, and fender assembly.
- If you face this error, there is a need to replace the fender and also check the frame, engine, and other parts of the car.
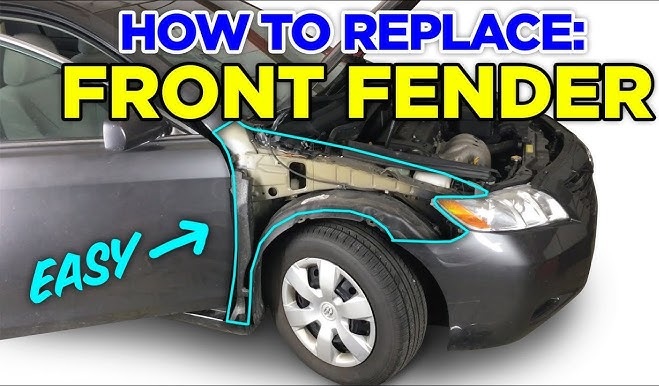
How to Replace a Fender on a Car?
Collect required tools.
First of all, get the required tools that are listed here.
- New Fender:
- Socket Wrench Set:.
- Screwdriver Set:.
- Trim Removal Tools:
- Body Hammer and Dolly
- Drill and Bit
- Rust Penetrant (WD-40):
- Painter’s Tape:
- Rubbing Alcohol or Wax and Grease Remover:
- Touch-up Paint (if needed):
- Safety Glasses and Gloves:
- Jack and Jack Stands:
- Work Light:
- Shop rags:
How to Replace a Fender?
Follow these steps.
Prepare Workspace
- First of all, park your car in a proper ground place and apply the brake. Then disconnect the car battery to avoid any short circuit and damage to the wire connection.
- With use of tape, the painter covers edges of the hood, door, and bumper close to the fender. It avoids scratches during installation.
- Now remove the connected wheel, but if not, there is no issue.
Remove Fasteners
- Fenders are connected on fender lining, so check any clips, screws, or bolts that are securing the lining. It helps to turn the steering wheel to the working side.
- Open the hood of the vehicle and check the bolts that are on the top edge of the fender to the chassis of the vehicle that we can find over the engine bay.
- Open the door on the side of the removing fender and check the bolts over the vertical edge where the fender is connected. That is covered with weather stripping.
- The fender comes with a connected bumper through clips, with the use of screws or bolts. According to the requirements, loosen or remove the bumper.
- In the last check, bolts below the fender to the rocker panel
Disconnect Old Fender
- Now disconnect the old fender easily; ensure that you have noted all wiring connections before removing. And other connections of tools with the fender.
New Fender Mounting Surface
- Before connection of the new fender, check that the new fender does not have any damage.
- With use of a rag or wax and grease remover, clean paint or adhesive at the place where the new fender connected. Remove dust particles also.
- If you are in an area where humidity exists, use a thin layer of anti-seize compound on bolt threads before connection to avoid rust.
Connect the New Fender.
- Now set the new fender in an accurate position, and for an accurate position, get help from someone.
- For installing the fender, loosen all bolts in the proper sequence, which helps to avoid cross-threading of the bolts.
- if there is an electrical connection,, conneccteed with the new fender, also connect clips with new fender.
- Now reconnect bolts and screw in the proper order as disconnected. Do not strongly tighten the bolts until the fender is in the accurate position.
- After completing the installation of fasteners, tighten them. First tighten the central bolts, and then the external bolts at last.
- After completion of fender installation, reconnect the internal fender liner and clips. not install the wheel again
Final Checks
- Check the door and hood many times to ensure that the opening and closing are not affecting the new fender and that it is easy to work with.
- Also check gaps over the new fender and panels. The gap is consistent and smooth. For changes, loosen the fender and reposition it.
- Now connect the car battery negative terminal.
- Remove painter tape and clean smudges
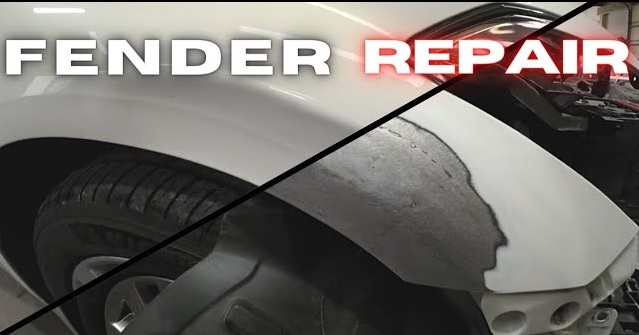
How to Repair a Dented Fender?
Tools:
- Sandpaper
- Hammer
- Dolly
- Automotive Paint
- Automotive Primer
- Ratchet
- Socket Set
- Radius Gauge
- Body Filler
- Automotive Clear Coat
Process
- For loosening bolts, use a ratchet and socket set that is configured to position the fender and remove the fender easily.
- Connect the fender having a dented upper side and hold the radius gauge. Use a radius gauge for measuring fender curvature. That is important since the dent pulled out to reveal the radius.
- Use a hammer and dolly, and hammer the dented area of the fender until the dent is removed and shows less. As a result, the surface becomes smooth.
- Put Dolly below dent and smoothly hammer the area over the edges of the dent. Put the dolly on the fender and hammer it. Slowly hammer since a hard hit can damage
- Continue hammering the process on the dent and for leveling the surface as much as possible.
- Check the curvature of the fender using of radius gauge for checking undulations. Put the dolly below the leftover dents and hammer on the upper part. In a result, slowly dense areas will be removed.
- This process removes about 90 percent of the dent.
- Around the dented part, use a mask and get 200-grit sandpaper and rub the surface to smooth it. not use a mask to paint the complete bumper.
- With use of body filler, remove minor grooves and cracks after the sanding process.
- With use of 2000-grit sandpaper, sand the fender to make the surface smooth.
- Use different layers of primer with painting. and use paint of the real color of the car
Rear Car Fenders
- Read fender can be disconnected and connected. We can use it with screw-mount parts, but users needed a permanent rear fender.
- The welder performed the welding process for a permanent connection for the rear fender. The locking of the rear fender is good since it is not easily removed. With that, it also prevents dust particles and different debris from entering the car body.
- The car fender is important since it makes an accurate connection, and the car fender should be replaced if damaged.
Front vs. Rear Car Fenders.
Front Car Fenders
- The front fender of the car is a flexible component that can easily disconnect or connect. A screw can be used for fixing it. It also has bolts that are used for permanent locking to avoid any shock effect when the car moves over hurdles.
- When a car moves over a steeper path, it is suggested that the front fender be permanently locked. The objective is to handle risk. It exists for Fender in a permanent system. Normally a permanent front fender comes with more components, such as trim lights and turn signal lights.
FAQs
Which tools can I use to replace a car fender myself?
- Different tools are used, such as wrenches, screwdrivers, body files, sanders, and paint sprayers.
Can you replace a car fender yourself?
- Yes, you can do it by yourself; for this there is a need for proper tools and skills.
How much time is taken to replace a car fender?
- the time taken for replacing the car based on skills and damage to the fender that define how much time will be taken to replace the car.
What are the steps to replace a car fender?
- The basic steps for replacing a car fender are first removing the older fender, checking the new fender, connecting the new fender, and applying body filler and sandpaper in the last painting.
Are there any risks of replacing a car fender yourself?
- The risk for replacing a car fender is that it can damage parts of the car, and improper new fender alignment and finishing are not accurately performed.